

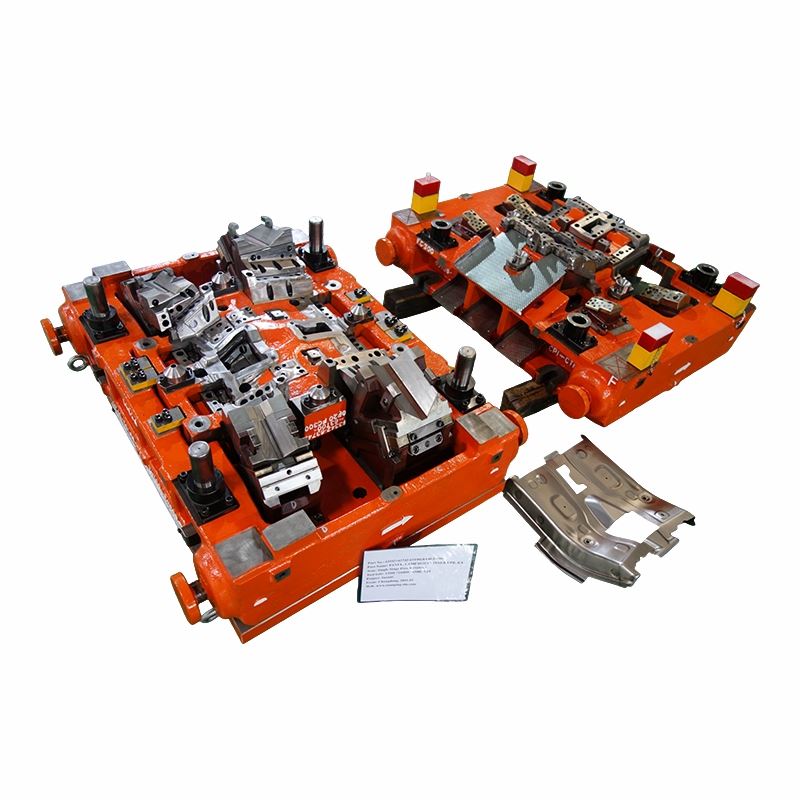
Piercing Die for Suzuki Lamp House Inner Upper Panel R/L
This Piercing Die was built for the Suzuki Panel, Lamp House Inner UPR, R/L automotive project. It is used as a dedicated single-stage operation for the formed right- and left-hand panels.
For Changdong, the first question on a project like this is not simply whether the punch is in the correct coordinate. The formed panel has to sit in the die correctly before the hole position can be judged.
If the incoming panel rocks, springs open or rests differently from the released geometry, moving the punch may only compensate for a locating problem. We therefore check the part condition and the nest together during tryout.

Product Parameters
|
Item |
Specification |
|
Product Name |
Piercing Die |
|
Project |
Suzuki |
|
Application |
Panel, Lamp House Inner UPR, R/L |
|
Tooling Type |
Single-Stage Piercing Tool |
|
Part Side |
RH & LH |
We Seat the Formed Panel Before Checking the Hole
A formed automotive panel is different from a flat blank. By the time it reaches the piercing operation, it already carries profile, flange and springback from the earlier stamping work.
During fitting, our toolmakers first place the real panel into the nest and look at how it contacts the locating surfaces. We do not want the pressure pad or punch action to force a poorly seated part into an artificial position.
If the incoming RH or LH panel is already different from the expected shape, that condition is recorded before we change the cutting components.
This keeps the diagnosis clean: part location first, piercing result second.
RH and LH Are Measured as Two Parts
Where the right- and left-hand panels genuinely mirror each other, we can use the same locating and inspection approach during tryout.
If the released RH and LH data differs locally, each result is checked against its own drawing. We do not copy a punch correction from one side to the other without measurement.
When one side shows a hole-position deviation and the other does not, we compare the way both panels sit in the nest before assuming the cutting components are different.
The Nest Must Support the Panel Without Re-Shaping It
This is one of the areas we pay attention to during die fitting.
A large support surface can make the panel look very stable, but if the support is too high locally it can change the profile before piercing. The part may measure differently again after it is removed from the tool.
We therefore use the actual stamped panel to check where the nest needs firm support and where a small amount of clearance is more appropriate.
For this Piercing Die, the nest is there to establish the part correctly for punching. It is not intended to become an unintended restrike operation.
Open Tool: Punch Position Is Only One Part of the Check
With the tool open, our team can compare the physical punch and die-button locations with the panel-support and locating areas around them.
If one hole needs correction, we first confirm that the part is sitting on the intended datum. Only then do we decide whether the punch position, die button or local support actually needs machining work.
Small punches also need enough support to avoid side load. This becomes more important where the hole is close to a formed wall or where the punch length cannot be kept very short.
Changdong keeps this type of correction close to our tool shop so the sample result, tooling condition and machining change can be reviewed by the same project team.

WEDM Support Makes Local Cutting Corrections Faster
Changdong has six WEDM machines in our Dongguan tooling facility. For a piercing project, that capacity is directly useful for die buttons, cutting inserts and other precision profiles.
If tryout shows that one feature needs a controlled change, the relevant component can return to our own machining flow instead of being sent to an outside supplier.
The toolmaker who inspected the sample can discuss the correction with design and machining directly. After modification, the tool goes back to trial and the new sample is compared with the previous condition.
That short loop helps us avoid large corrections when the actual problem is local.
Burr and Slug Condition Are Checked Together
A clean hole on the first sample is not the only thing we want to see.
We also watch what happens to the slug after repeated strokes. If a slug follows the punch back toward the panel, it can leave dents or tool marks even though the cutting edge itself is acceptable.
Burr growth is another useful clue. If one feature begins changing faster than the others, we inspect that local punch and die-button condition rather than servicing the complete tool at the same time.
This makes maintenance more targeted and keeps good cutting areas untouched.
Completed Suzuki Piercing Tool

Completed single-stage piercing tooling for Suzuki Panel, Lamp House Inner UPR, R/L.
What Changdong Keeps With the Approved Result
The useful handover condition is more than a closed piece of tooling.
We keep the approved RH and LH sample condition connected with the tooling revision used during tryout. When a cutting component is serviced later, the new first-off sample has a known reference for comparison.
On a Piercing Die project for a formed automotive panel, that reference is important because the final hole result depends on both the cutting components and the way the panel sits in the tool.
Changdong's goal is to leave the customer with a piercing process that can be understood and recovered after normal maintenance, rather than a tool that only produced the right sample once.
Hot Tags: piercing die, China piercing die manufacturers, suppliers, factory, gang bending die, gang metal stamping die, gang stamping die, metal stamping gang dies, single operation stamping dies, single station dies


